On this third part, we create publish WEB-page using Content Swithing Virtual Server created in part 1, and Load Balancing Virtual Server created in part 2.
So, log in to your Netscaler and go to:
Traffic Management -> Content Switching -> Virtual Servers
Select Virtual Server and click edit

Click 'No Content Switching Policy Bound'

Click on 'Click to select' under 'Select Policy'

Click 'Add' to create new policy.

Give name for policy and set this as an expression:
HTTP.REQ.HEADER("host").SET_TEXT_MODE(IGNORECASE).EQ("ubuntu.local.dom")

Click on 'Click To Select' under 'Target Load Balancing Virtual Server'

Select LBVS created in part 2 and click 'OK'

Click 'Bind'

Click 'Done'

And now, since my DNS points address 'ubuntu.local.dom' to IP-address 192.168.86.3, I can test if this works:
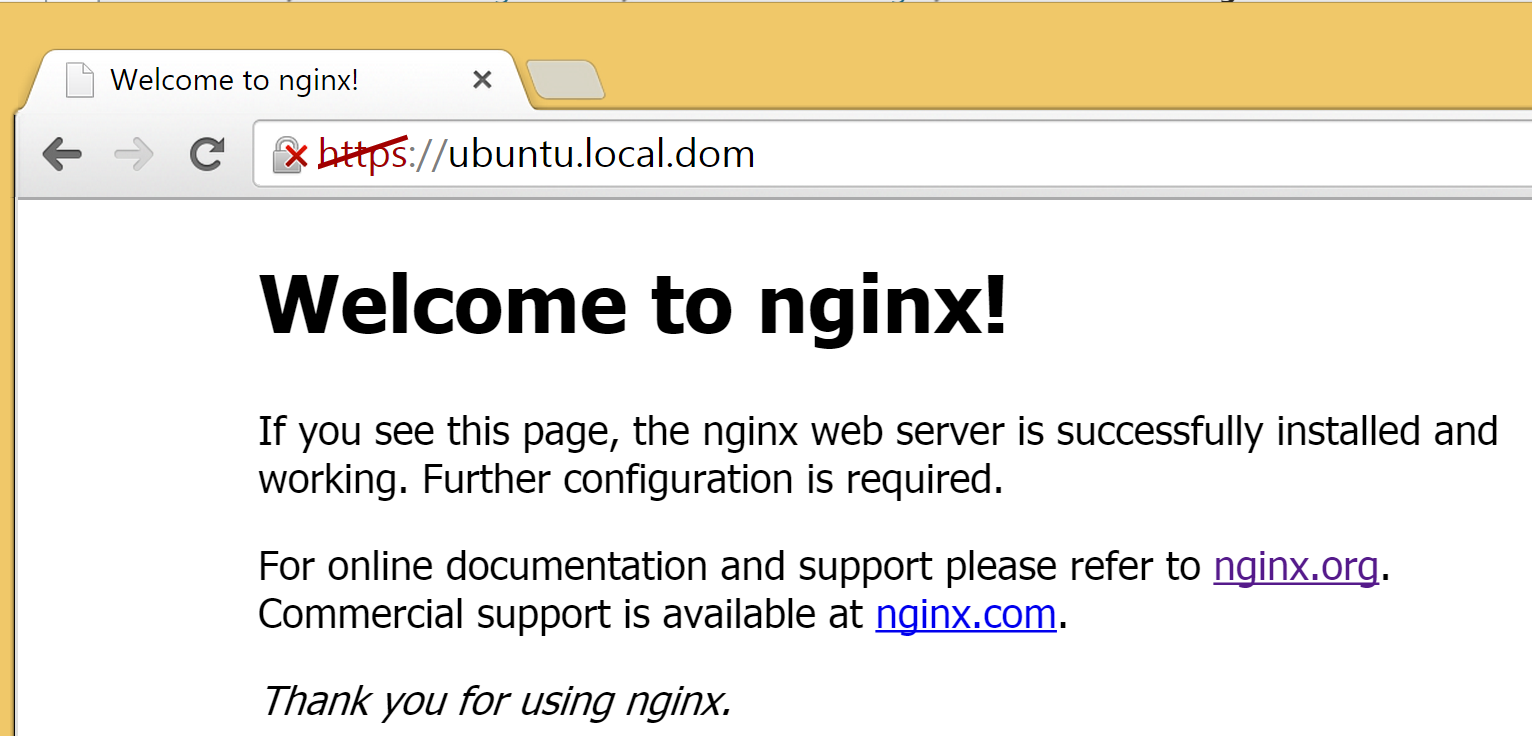
And it does!
That page is shown to me through Netscaler. As you can see, connection is HTTPS, even though nginx in my Ubuntu test server is not configured to use HTTPS, so netscaler does SSL offloading at this point.
With these three first posts, you should be able to publish WEB-sites with Netscaler Content Switching feature. To add more sites to be shown behind same IP-address, just follow steps on part 2 & 3 to add more servers behind that one IP-address.
And how to do this with CLI:
add cs policy redirect_ubuntu-nginx -rule "HTTP.REQ.HEADER(\"host\").SET_TEXT_MODE(IGNORECASE).EQ(\"ubuntu.local.dom\")"
bind cs vserver ContentSwitch-VIP -policyName redirect_ubuntu-nginx -targetLBVserver LBVS_ubuntu -priority 100
On next part, I'll show how to redirect HTTP traffict to HTTPS with Content Switching
No comments :
Post a Comment