Tuesday, March 17, 2020

Using Veeam Backup for Microsoft Windows FREE to protect your PC

People around the world are currently working from home, and for many people it's the first time that they have to work from home for extended period of time.

And some of you might wonder, how to take care of backups during this time.

Veeam has a free solution for that, Veeam Agent for Microsoft Windows FREE.

It's exactly the same product as it's commercial versions, Workstation & Server. It just has a bit less features and it only has best effort support. 

Use above link to get your copy, and then let's do install and basic configuration.

In this example, I'm using external USB drive to take backups.

First run installer, it really is a one click install:


After installation is finished, you are asked if you want to setup backups to USB, and we are doing that.

So connect your external drive to your Windows machine and click Next:


You will be asked if you want to change your power plan. You can safely click "No", unless you want to take your backups during night time.


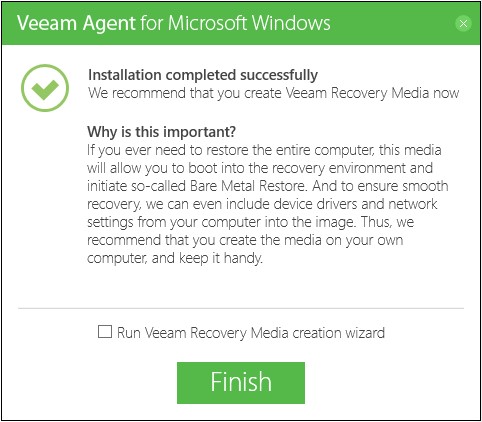
Next you will be asked whether you want to create Bare Metal Recovery media. I'm not covering that part in this blog, but you can find detailed instructions from Veeam documtation

So we skip that part and deselect "Run Veeam Recovery Media creation wizard"


Now we have installed Veeam Backup for Microsoft Windows, and configured it to take backup of whole computer to your external USB drive, at 00:30.

But I want it to take backups when I connect by USB drive to my laptop, so let's change configuration.

First, open GUI -> Go to start and search for Veeam Agent for Microsoft Windows


When GUI opens, it asks you if you want to install license. Answer "No", since we are using this tool in free mode.


Then let's modify our backup job, selcet "Edit Job"

.
You can change name of the job if you want to:


You can choose what you want to backup. By default it's "Entire computer", but in this example we are only taking backup of user files, so I selected "File level backup"


I selected "Personal files", which means everything under users profiles.


My target is Local storage (USB-disk). If you have network share in use, you can also use that (select "Shared folder"), or you can also push your backups to OneDrive


By default, backups go to <driveletter>:\VeeamBackups\. Also by default, 7 days of retention is kept. You can change these settings if you want to, but I'm leaving them to defaults.


I deselected "Daily at", since I don't want to keep my laptop running at night, instead I selected "When backup target is connected", so when I connect my external disk, Veeam automatically runs a backup.


After doing changes, summary page is shown, and you can also select "Run the job when I click Finish", so you can take your first backup right away!


If you want to track progress, you can click "Processing" to see details


And when backup is finished, you see details. For me, I had almost 40GB of data to be backed up, and it took 16 minutes. Does it slow down your laptop so you cannot work while taking backup? No it does not, I actually let that run while writing this blog post.


After backup has been finished, you can detach your USB drive (make sure that it's safely removed)

On a next day, when you reattach that same USB drive, Veeam will automatically do incremental backup. If you want to track progress, you can open Veeam backup for Microsoft Windows GUI again.


Since only few changes had happened since last backup, incremental backup lasted only 2 minutes.


What about file restore?

Connect your USB disk and open GUI. Select "Restore file"


Select restore point where you want to restore your files:


Click open, and wait for new window to open


From this window, you can browse your files and do restores. You can restore to original location by Overwriting existing files, or using Keep, when files are restored with a suffix.

Or you can use "Copy To..." and restore files to different location.


After you have finished restoring files, you can simply close this window.


One good habit for backups could be, to connect your USB drive always when you are having lunch, or maybe at afternoons coffee break? Or last thing before closing computer?

Anyways, take good care of your data!


Tuesday, February 18, 2020

New in Veeam Backup & Replication v10: Linux Repositories with XFS support

One of enhancements in Veeam Backup & Replication v10, is possibility to use XFS file system and FastClone, which is similar that Veeam has utilized with ReFS for years already.

But how to set-up it? First of all, you need to have Linux server that meet's requirements.

Basically what you need is:
  • Ubuntu 18.0.4 or later. For other distributions, Fast Clone support is experimental.
  • XFS file system
  • Cyclic redundancy check (CRC) is enabled
  • The minimum supported data block size is 1 KB. The maximum supported block size is 4KB
And you can format your disk like this:

mkfs.xfs -b size=4096 -m reflink=1,crc=1 /dev/sdb1

This is how it looks:


Now we can add our repository to Veeam Backup & Replication, in console, go to Backup Infrastructure -> Backup Repositories -> Right click -> Add backup repository.

(Wan't to do it with PowerShell? Scroll to end of page)


Select "Direct attached storage"


Select Linux


Give name and description for your repository


If you have already added your Linux machine as managed server to Veeam, you can just select it from drop down menu, if not, click "Add new"


Enter FQDN or IP-address of Linux machine. Notice, that you need to have SSH and Perl installed.


Select credentials to use, typically it is best to use dedicated service account. If you have not previously entered account info, you can do it with "Add..."


Validate SSH key fingerprint


And in a short moment you see that server has been added


Now back in "New Backup Repository" wizard, your newly added server will be automatically selected.


Click browse, to select path that is used for this repository


Select folder..

Select "Use fast cloning on XFS volumes" checkbox


Select mount server. Notice, that you cannot use Linux repository as a mount server, it has to be a Windows machine. I'm using my Backup & Replication machine in this example.


You can review your settings


And when you click Apply, your new repo will be added


Finally you will see a summary page that confirms that new repository has been successfully created


We can, of course, do the same thing by using PowerShell, with just couple of lines.

First we get our credentials and then add Linux machine to Backup & Replication. If you already have Linux machine added, you can skip this step. As you can see, I was a bit lazy, and used screenshot from previous post, since process of adding Linux machine does not differ, if it's used as a Proxy or a Repository


Then we configure it as a repository. As you can see, we first read information about mount server and Linux server to variable, and then use them as parameters when we add repository.

You also need to set folder, type and use "-EnableXFSFastClone" to enable Fast Cloning in XFS volumes.


Actual code:


$credential = Get-VBRCredentials -Name <YOURCREDENTIALNAME>
Add-VBRLinux -Name <FQDN OF LINUX MACHINE> -Credentials $credential
$mountserver = Get-VBRServer -Name <YOURMOUNTSERVER>
$reposerver = Get-VBRServer -Name <YOURREPOSERVER>
Add-VBRBackupRepository -Name <YOURREPONAME> -Description <YOURDESCRIPTION> -Server $reposerver -MountServer $mountserver -Folder <YOURFOLDER> -Type LinuxLocal -EnableXFSFastClone


Tuesday, February 4, 2020

New in Veeam Backup & Replication v10: Linux Proxies

One of the many new features in Veeam Backup & Replication v10, is Linux proxy.

You can use Linux proxies in your VMware environment.

Adding new Linux proxy is really simple.

(Wan't to do it with PowerShell? Scroll to end of page)

In Backup & Replication console, go to Backup Infrastructure -> Backup Proxies -> Right click -> Add VMware backup proxy.


If you have added your Linux machine as a managed server to Backup & Replication, select it from drop down list, otherwise select "Add New..."


Select "Linux"

Enter FQDN or IP-address of Linux machine. Notice, that you need to have SSH and Perl installed.


Select credentials to use, typically it is best to use dedicated service account. If you have not previously entered account info, you can do it with "Add..."


Validate SSH key fingerprint


And in a short moment you see that server has been added


Now back in "New VMware proxy" wizard, your newly added server will be automatically selected.


Do note, that "Transport mode" and "Connected datastores" selections are grayed oyt. That is, because Linux proxy only works in "Virtual appliance" mode

If in VMware VM settings, you do not have disk.enabledUUID=TRUE parameter, you will get following warning. Select "Yes" to pick VM from vCenter manually


Select "Browse..." to select your VM


You can use search to find your machine


And you will see your machine selected


You will also get a warning that your Linux machine will be rebooted. This is because Veeam add's that missing parameter to VM's configuration


You can set Throttling settings if needed


And when you click "Apply" your proxy will be configured


And finally you get summary that states that Linux Proxy has been successfully created


And that's it! Your new Linux proxy is now ready to be used in backup jobs. If you are using automatic selection in job settings, it will automatically be used in next backup and replication jobs!


Looking for PowerShell magic? Well, here we go:


First we get our credentials and then add Linux machine to Backup & Replication. If you already have Linux machine added, you can skip this step


Same as with wizard, if you VM does not have disk.enabledUUID=TRUE parameter in place, you will get error when you try to add Linux proxy:


So we will first search our VM, and give it as a parameter to PowerShell command:

Code:


$credential = Get-VBRCredentials -Name <YOURCREDENTIALNAMEHERE>
Add-VBRLinux -Name <FQDN OF LINUX MACHINE> -Credentials $credential

$vientity = Find-VBRViEntity -Name "<VMNAME IN VSPHERE>"
Get-VBRServer -Name "<FQDN OF LINUX MACHINE>" | Add-VBRViLinuxProxy -ProxyVM $vientity