On this second part, we create Load Balancing Server, Load Balancing Service and Load Balancing Virtual Server.
Let's start with Load Balancing Server, it describes our back-end server itself, not any services that it might be offering.
So, log in to you Netscaler and go to:
Traffic Management -> Load Balancing -> Servers
Click 'Add' button, to add new Server

All you need, is name for your server and IP-Address. In this example these are:
Server Name: ubuntu_backend
IPAddress: 192.168.174.130
And click 'Create'
Good practice is to use back-end servers real hostname as a server name here.


Next, we set-up a Service.
G to:
Traffic Management -> Load Balancing -> Services
Click 'Add' button, to add new Service
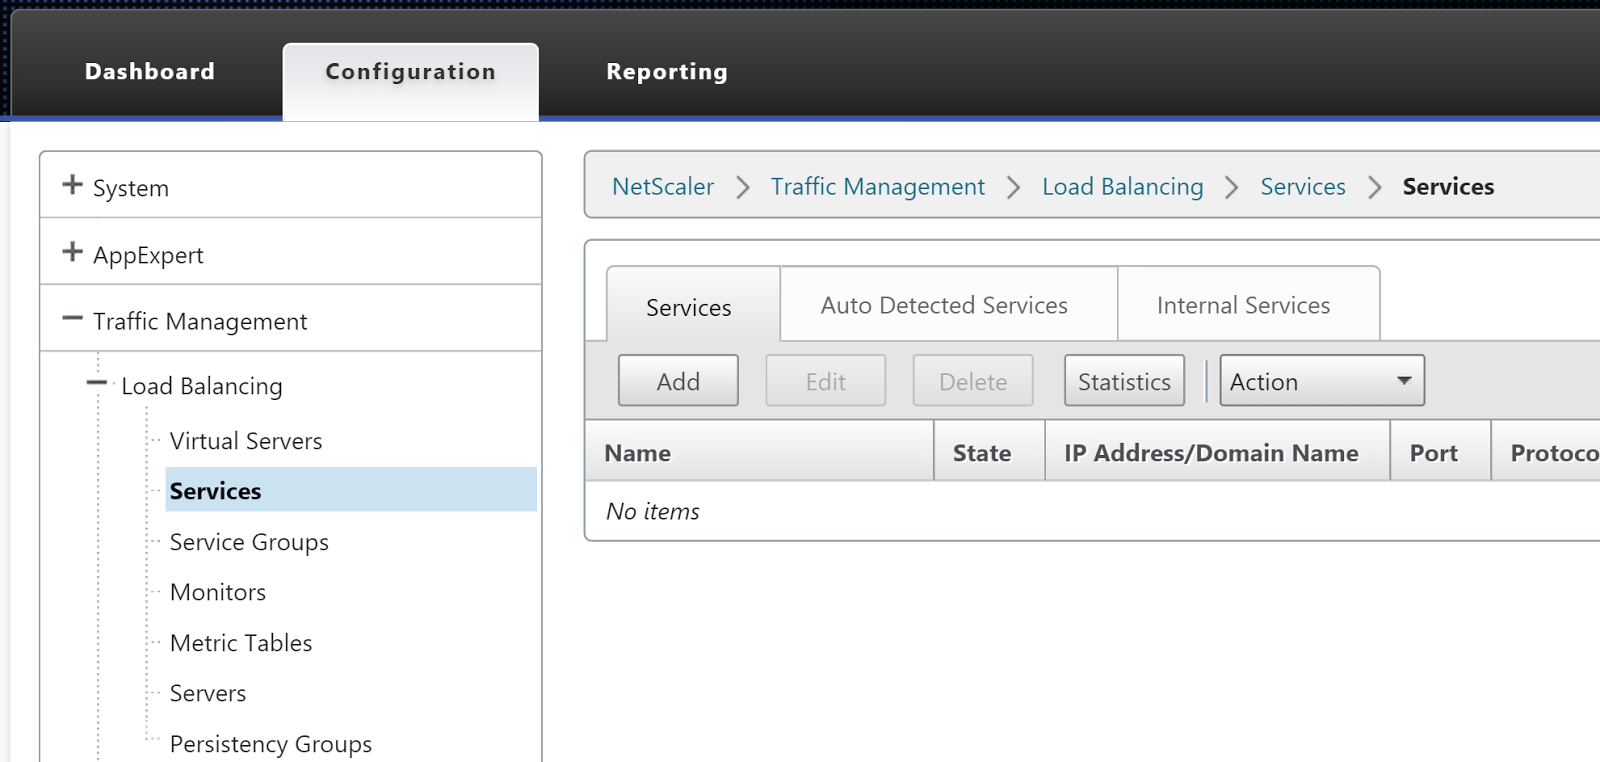
Settings in this example:
Service Name: ubuntu_backend_http
Then we select 'Existing Server' and select our newly created Server to be used in this service: ubuntu_backend
And as my demoserver listens only on HTTP port, we use Procol: HTTP and Port: 80
And click 'OK'


And here we can see our new service, and because my back-end server is up and running, it's state is 'Up'

And last thing to do, is to create a Load Balancing Virtual Server.
So, go to:
Traffic Management -> Load Balancing -> Virtual Servers
Click 'Add' button, to add new Load Balancing Virtual Server (LBVS)

In basic settings, most important thing is to set 'IP Address Type: Non Addressable', that is because we want to use this with Content Switching.
Name: LBVS_ubuntu
Protocol: HTTP
IP Address Type: Non Addressable
Click 'OK'

Click on 'No Load Balancing Virtual Service Binding'

Click on 'Click to select'

Select our newly created Service and click 'OK'

Click 'Bind'
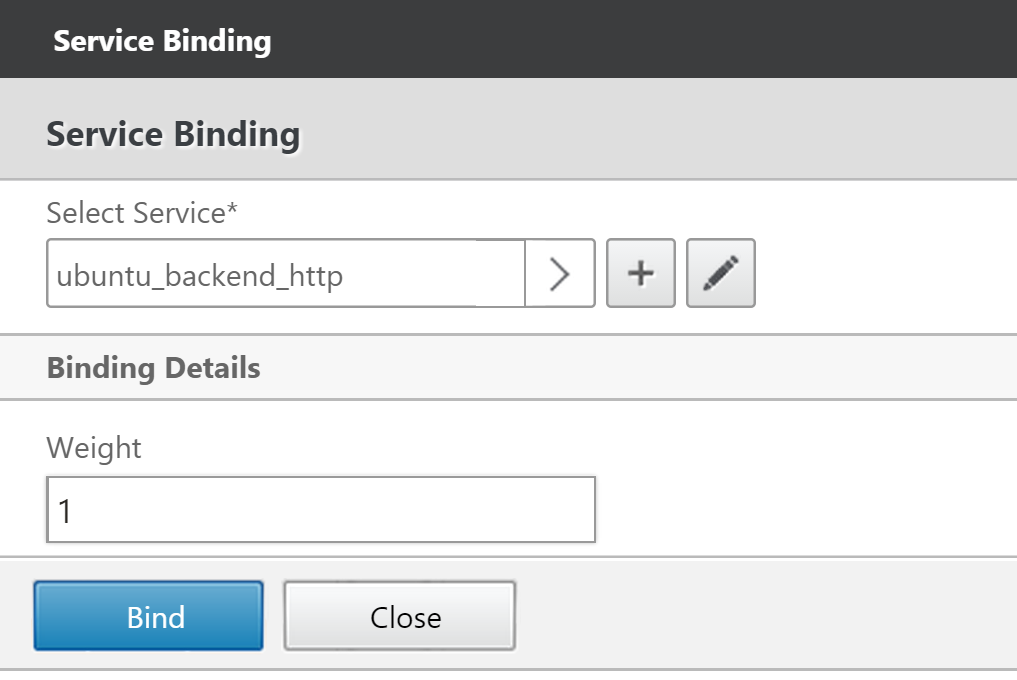
Click 'OK'

And click 'Done'

And our new Load Balance Virtual Server is done.
It will show it's State to be 'Down', but click on refresh


To do these in CLI:
Create Server
add server ubuntu_backend 192.168.174.130
Create Service
add service ubuntu_backend_http ubuntu_backend HTTP 80 -gslb NONE -maxClient 0 -maxReq 0 -cip DISABLED -usip NO -useproxyport YES -sp OFF -cltTimeout 180 -svrTimeout 360 -CKA NO -TCPB NO -CMP NO
Create LBVS and bind service to it
add lb vserver LBVS_ubuntu HTTP 0.0.0.0 0 -persistenceType NONE -Listenpolicy None -cltTimeout 180
bind lb vserver LBVS_ubuntu ubuntu_backend_http
On a next part, I will combine what that has been done on two first parts to publish a WEB-site.
No comments :
Post a Comment